From Dropbox to Daily Driver Part 2: Flashing the Card and the First Boot
Part 1 set the threat model and made the storage call: this build runs from a 128GB microSD card, not a USB SSD, and Ansible in Part 8 is the real mitigation for that choice rather than a hardware upgrade. This part is where that plan turns into an actual device: burning the card, working through Raspberry Pi Imager’s customisation options, and getting to a first successful SSH login.
Headless by default, and why that’s worth a paragraph
This build has no monitor, keyboard, or mouse anywhere near it, and never will. That’s not a constraint imposed by the hardware, it’s the deliberate choice behind picking Raspberry Pi OS Lite (64-bit) in Part 1: a desktop environment on a device administered entirely over SSH is attack surface with no matching benefit, not a convenience.
It’s worth being explicit about this rather than assuming every reader shares the same instinct. Anyone coming from a desktop-first Pi setup, running Raspberry Pi OS with the desktop for a media centre or a general-purpose machine, will reasonably expect a screen and a first-boot wizard. This device gets neither. Everything from here on happens over SSH, starting with the first connection this post ends on.
The Imager version story
The instinct is to grab whatever Raspberry Pi Imager download the official site currently serves and move on, and that’s exactly where this build started: raspberrypi.com/software was still serving v2.0.10. A quick check of the GitHub releases page turned up v2.0.11.1, a day newer, with one notable addition: Exclusive Drive Locks, a safety feature aimed squarely at preventing the exact mistake this post’s next section jokes about. The official downloads page hadn’t caught up yet.
For a build where getting the target device right matters, that extra safety net was worth the manual install. The .exe came straight from the GitHub release, and it’s worth verifying the checksum on anything installed outside a package manager:
Get-FileHash .\imager_2.0.11.1.exe -Algorithm SHA25694FFDED522F3E2A38BDB9505440229E1411B80992A616BA16B2D7E73BD794130Worth being honest about what that checksum actually proves here: it’s a value computed locally against the downloaded file, not one cross-checked against a published vendor hash, since Raspberry Pi’s release page didn’t list one alongside the GitHub asset at the time of download. It confirms the file wasn’t corrupted or truncated in transit. It doesn’t independently prove the binary is what the maintainers intended to publish. For a tool with this much access to a block device, that distinction is worth keeping in mind rather than treating a self-computed hash as a full integrity guarantee.
Burning the card
Two genuine build methods went into this device, because the day-to-day reality is that this build gets done from whichever machine is in front of the person at the time.
Raspberry Pi Imager, the path this build actually used on the day, walks through target device, OS image, and storage selection, then drops into the customisation screen covered below. The one easy-to-miss detail: this machine’s microSD card shows up as an SDXC card, reached through a micro-to-SD adapter in a laptop’s built-in card reader. That’s the SD card, not a different medium, appearing under the name its capacity class actually goes by.
The dd route, the normal method on Linux and the one this build would fall back to without Imager installed, is worth including for completeness even though it skips Imager’s customisation screen entirely:
sudo dd if=raspios-lite-arm64.img of=/dev/sdX bs=4M status=progress conv=fsyncThat command deserves its usual warning, only half as a joke: of=/dev/sdX needs to point at the microSD card and nothing else. Run lsblk or sudo fdisk -l immediately beforehand to confirm the device name, because getting it wrong doesn’t throw an error, it just quietly starts overwriting whatever /dev/sdX actually points to. Every guide that mentions dd repeats this warning for a reason: the command has no built-in concept of “are you sure.”
The customisation screen
Imager’s advanced options screen is where a Pi build stops being generic and starts being this device. Three settings drove this one:
Hostname: pi4-128g. Descriptive rather than clever, naming the storage medium and capacity so it’s identifiable at a glance on a network with more than one Pi on it.
Authentication: no SSH key was ready to hand at flash time, so this device was set up with a username and password through Imager’s built-in option, shown here with the placeholder username this site uses for all example commands:
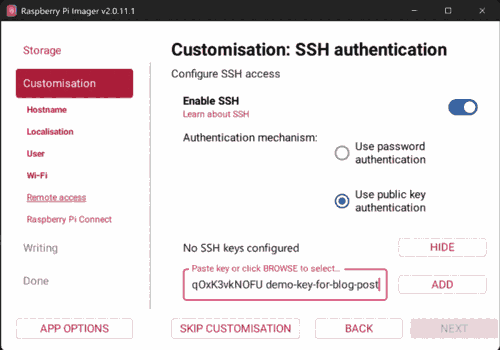
That screen also shows the alternative most guides lead with: pasting a public key directly into Imager and skipping password auth from the very first boot. It’s the better starting point when a key is already generated and sitting ready, and it’s exactly what Part 3 sets this device up to use going forward, generating a real key and disabling password authentication entirely as its opening move. For this build, password auth got the device through its first boot, and the key-based hardening happened deliberately afterward rather than being skipped.
Networking: this Pi is PoE-powered, meaning a wired Ethernet connection is a physical requirement of how it’s mounted and powered, not just a preference. Wi-Fi got configured in Imager out of habit, since it’s the default for most other Pi builds in this setup, but it’s never used on this device and every example from here on assumes eth0. Different Pi builds around the house go headless over Wi-Fi with no Ethernet run at all; this one simply isn’t one of them.
One more setting worth showing: Raspberry Pi Connect, Raspberry Pi’s own remote-access and screen-sharing service, left switched off.
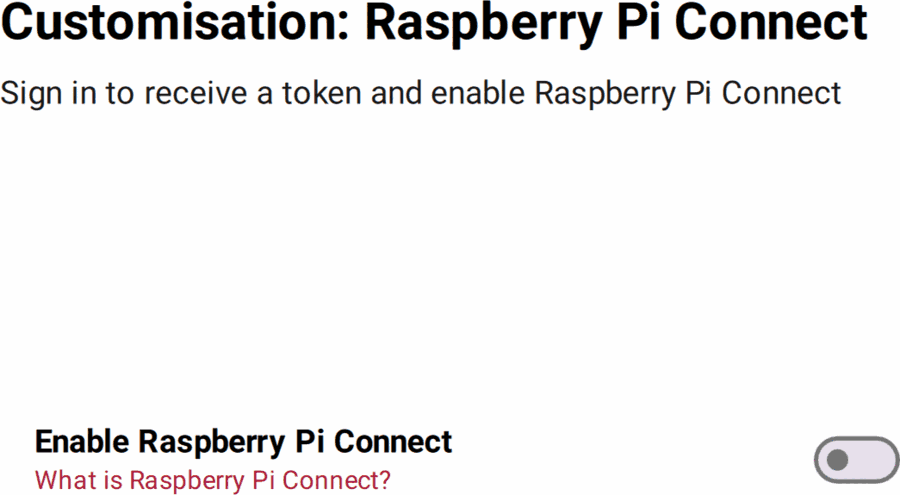
This build’s remote access story is Part 5’s Cloudflare Tunnel with a Zero Trust Access policy in front of it, a plan formed before Imager’s customisation screen was ever opened. A second, unmanaged remote-access path sitting alongside the one actually being built and audited is exactly the kind of loose end this series is trying not to leave.
First boot
With Ethernet connected and the Pi powered over PoE, the first sign of life is whenever it shows up on the network. A few minutes after power-on:
$ ssh michealg@192.168.1.187
The authenticity of host '192.168.1.187 (192.168.1.187)' can't be established.
ED25519 key fingerprint is SHA256:[elided — see note below].
This key is not known by any other names.
Are you sure you want to continue connecting (yes/no/[fingerprint])? yes
Warning: Permanently added '192.168.1.187' (ED25519) to the list of known hosts.
michealg@192.168.1.187's password:
Linux pi4-128g 6.18.34+rpt-rpi-v8 #1 SMP PREEMPT Debian 1:6.18.34-1+rpt1 (2026-06-09) aarch64

The programs included with the Debian GNU/Linux system are free software;
the exact distribution terms for each program are described in the
individual files in /usr/share/doc/*/copyright.

Debian GNU/Linux comes with ABSOLUTELY NO WARRANTY, to the extent
permitted by applicable law.
michealg@pi4-128g:~$
That’s a real first login against this device, with the username and IP address swapped for this site’s usual placeholders. The one thing deliberately left out is the actual ED25519 host key fingerprint: it’s not a secret in the way a password is, but it’s a permanent identifier tied to this specific physical device, and it’s staying out of a public post until that’s a deliberate call rather than an oversight. The kernel line is exactly what this device reported: 6.18.34+rpt-rpi-v8, dated 2026-06-09, confirming the Trixie image booted the 64-bit kernel Part 1 chose it for.
That TOFU (trust-on-first-use) prompt, accepting a host key neither Imager nor this post can pre-verify, is worth pausing on rather than reflexively typing yes. On a local network, immediately after flashing a card personally, the realistic risk of it being anyone other than this Pi is close to zero. That confidence doesn’t hold on a network that isn’t fully trusted, which is exactly why Part 5’s Zero Trust Access layer exists for anything reached over the internet rather than relying on TOFU alone.
What’s next
The device now boots, answers on eth0, and accepts a password-authenticated SSH session as michealg. That’s a Raspberry Pi, not yet a hardened one. Part 3 starts there: generating a real SSH key, installing it, and turning password authentication off for good before anything else gets configured.
Sources: Raspberry Pi Imager releases, Raspberry Pi software downloads